
DIY Cabinet Handle Installation: A Step-by-Step Guide
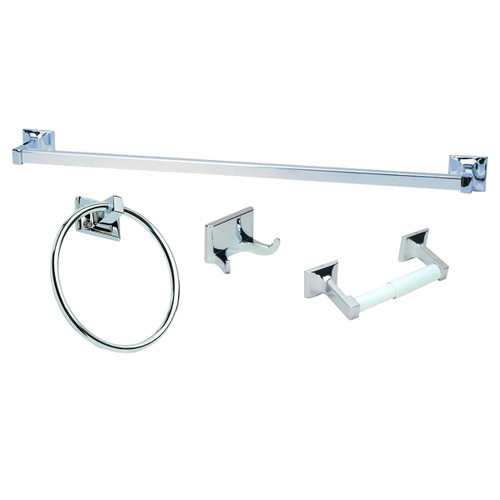
Installing cabinet handles is a one-afternoon project. The only mistake that costs you is drilling in the wrong spot. Everything else is straightforward. Here is exactly how to do it right.
Tools You Need
Drill with 3/16 inch drill bit Cabinet hardware jig or DIY cardboard template Screwdriver Painter's tape Pencil and tape measure Small scrap piece of wood Clamps Level
A hardware jig is worth buying for a full kitchen. Hand measuring each cabinet individually introduces errors that accumulate across an entire wall and show up as off-center pulls on cabinet seven, eight, and nine.
Step 1: Remove Old Hardware
Open the cabinet door or drawer and locate the screws on the inside face. Unscrew and pull the old handle off. If screws are rusted or stuck, apply a drop of WD-40, wait one minute, then try again.
Check the existing hole center-to-center measurement before anything else. Measure from the center of one hole to the center of the other. Standard sizes are 96mm, 128mm, and 160mm. If your new pulls match this measurement no re-drilling needed. If they do not match, fill old holes with wood filler, sand flush, touch up the finish, and re-drill.
Step 2: Clean the Cabinet Surface
Wipe the cabinet face where the new hardware will sit. Grease, dust, or old adhesive residue causes the handle to sit unevenly. A clean surface ensures the hardware mounts flush.
Step 3: Decide Placement
Upper cabinet doors: 2 to 3 inches from the bottom corner opposite the hinge Lower cabinet doors: 2 to 3 inches from the top corner opposite the hinge Standard drawers: centered horizontally and vertically on the drawer face Wide drawers 24 inches or wider: two pulls at the one-third and two-thirds points or one extra-long pull centered Shallow drawers under 4 inches tall: slightly above true center
Apply painter's tape over the drilling area before marking. Use mounting putty to temporarily stick the handle in position, step back, and confirm placement looks right before marking anything permanently.
Step 4: Set Up the Jig
If using a hardware jig, set it to your hole center measurement and lock it in place. Position against the corner of the door or drawer face aligned to your placement from Step 3. Confirm it is flush against both the edge and face before marking.
If making a DIY cardboard template, cut it to match the drawer or door dimensions, find center by folding both ways, mark hole positions using the center-to-center measurement divided by two from center point, and punch holes through with a nail. Reusable across every identical drawer in the kitchen.
Step 5: Mark and Double-Check
Mark hole positions through the jig or template with a pencil. Use a level to confirm marks are level across the door or drawer face. On a full wall of cabinets check that mark height is consistent from one cabinet to the next before drilling anything.
Step 6: Drill the Holes
Clamp a small scrap piece of wood to the inside of the cabinet door or drawer directly behind each marked hole. This prevents the drill bit from splintering the wood on exit.
Use a 3/16 inch drill bit. Go slowly and keep the bit perpendicular to the cabinet face. Drill halfway through from the front then finish from the back for a cleaner exit hole.
Remove painter's tape after drilling.
Step 7: Install the Hardware
Insert mounting screws from inside the cabinet through the holes and into the handle on the front face. Hand-tighten first to confirm alignment then use a screwdriver to secure.
Do not over-tighten. Excessive torque strips the screw thread or cracks the cabinet face. Tighten until the handle sits flush and does not wobble.
Step 8: Check Alignment Across All Cabinets
Step back and check the full wall. Look at height consistency across all upper cabinet doors, lower cabinet doors, then all drawers. If one handle is off, loosen the screws, adjust, and re-tighten.
Replacing Hardware with Different Hole Centers
If new hardware has the same center-to-center as old hardware it drops straight in. No drilling needed.
If the center-to-center differs, two options. Use a backplate that covers old holes and accommodates the new center spacing. Or fill old holes with wood filler, sand flush, touch up the finish, and re-drill at the new position.
Common Mistakes
Skipping the scrap wood backing. Without it the drill bit tears out the back of the cabinet door on exit and leaves a ragged hole visible from inside.
Over-tightening screws. Strips the thread and cracks the cabinet face. Tighten until flush then stop.
Not using a level before drilling. A single off-level mark on a full wall of cabinets is immediately visible once everything else is aligned.
Ordering hardware without a sample first. Scale and finish look different in person than on a screen. Order one pull and one knob, hold them against the actual cabinet under real lighting before committing to a full kitchen order.
Frequently Asked Questions
What drill bit size do I need for cabinet hardware?
A 3/16 inch drill bit handles most residential cabinet hardware mounting screws. Confirm against your specific hardware specs before drilling.
Do I need a jig to install cabinet hardware?
For one or two cabinets hand measuring works. For a full kitchen a hardware jig costing $15 to $25 keeps every hole identical and eliminates errors across a full wall of cabinets.
How do I install cabinet hardware without drilling new holes?
If new hardware has the same center-to-center as existing holes no drilling needed. Measure existing hole spacing before ordering. If the center-to-center differs use a backplate to cover old holes.
Where should cabinet pulls be placed on doors?
Upper cabinet doors: 2 to 3 inches from the bottom corner opposite the hinge. Lower cabinet doors: 2 to 3 inches from the top corner opposite the hinge.
Where should cabinet pulls be placed on drawers?
Centered horizontally and vertically. Shallow drawers under 4 inches: slightly above center. Wide drawers 24 inches or wider: two pulls at one-third and two-thirds points.
At Inside Out Hardware we carry cabinet pulls and cabinet knobs from Cosmas and Designers Impressions in satin nickel, matte black, oil rubbed bronze, polished chrome, and brushed brass. Free shipping on orders over $50 across the USA.
LATEST NEWS
How to Change a Door Knob: Complete Step by Step Guide
How to Change a Door Knob Changing a door knob is a 10-minute DIY project. You need a Phillips head...
Satin Nickel vs Brushed Nickel: What Is the Difference
Satin Nickel vs Brushed Nickel: What Is the Difference Brushed nickel has visible directional lines...
Best Hardware for White Cabinets: Finishes and Style Guide
Best Hardware for White Cabinets Matte black gives the boldest contrast on white cabinets. Brushed b...

Black Kitchen Hardware: Matte Black Pulls and Knobs Guide
Black Kitchen Hardware Matte black is the most popular kitchen hardware finish in the US market. It...

How to Choose the Right Door Hardware for Your Home
Door hardware comes down to four decisions: function, style, finish, and measurements. Get function...
How to Clean and Maintain Cabinet Hardware: Complete Care Guide
The right cleaning method depends on the finish. Using the wrong product causes permanent damage no...